

Posts about 520 Park Apartments in Mount Vernon


7 Tips for Moving on Short Notice
Planning a move in the near future (hopefully here!)? Where do you start? Read our guide below for some tips on ensuring a smart and relatively stress free move when your deadline has come down to the wire. 1. Get Started When planning your move on short notice, you'll want to begin by properly assessing everything that may be required for the weeks (or even months) ahead. Confirm the fundamental info of your move before delving into the more complicated steps that require making paid reservations and the like, knowing an exact move-in date, etc. will help lay a fundamental groundwork that will allow the process to go much smoother overall. 2. Begin Pre-Packing You don't need to wait for every bit of paperwork to be filled out before beginning to pack, in fact, preliminary packing of less commonly-used rooms can prove to be an outright requirement. A good rule of thumb is to start packing at least a few boxes per day once you're sure you'll be moving in the near future. And start getting your place cleaned up if you are able to, this will save you cleaning time later. 3. Make Reservations This one is no joke, moving during the summer means dealing with the busiest and most booked-solid mover schedules of the year. Arguably the most important factor in avoiding major issues will be to contact your movers of choice the moment your move in date is confirmed. Otherwise, there's an unfortunate and potentially disastrous chance that you may find yourself without any movers available in time, definitely the furthest thing from a fun situation to have to deal with. 4. Set Your Own Deadlines Managing an arduous task like moving on short notice means you'll need to pay special consideration to the importance of deadlines, in this case, managing your own self-discipline and ensuring things get done in time will be extremely important. Set your own personal deadlines for when moving milestones should be completed, and before you know it you'll have formed a realistic (and informed) moving timeline that gives you a clearer understanding of what to expect. 5. Recruit Help from Friends As challenging as moving tends to be, you can expect to take those challenges and multiply them tenfold if you're facing them on your own. Recruiting the help of even just one or two friends can go an extremely long way in making the process much faster and much less of an overall burden a committed team of friends can even sometimes knock out an apartment move in as little as one afternoon. Just be sure to reward them with pizza afterwards! 6. Compare Rates A major factor in ensuring a smooth move without much time to spare will be to lock down an affordable overall rate as early as possible, you won't want to scramble for a moving package at the last minute, only to find that the one you had in mind will run you considerably more than you wanted to pay. Price can (and should) serve as a large deciding factor in your choice of movers and services, so there's certainly nothing wrong with shopping around based primarily on price! Knowing how much you'll be able to spend will most likely prove to be one of the earliest things you'll need to get done before you proceed. 7. Label Boxes Smartly One of the simpler ways to keep your moving process running smoothly can be to come up with a simple method for labeling your personal possessions a few rolls of colored painter's tape or something similar will usually be all you need. Before moving in, coordinate the layout of your destination by deciding on a color (or similar labeling distinction) for each room or major area across your new home. Then, label your boxes and containers appropriately so that the contents intended for each room match their corresponding color. This will allow you to quickly unload the contents of each room without having to give it too much thought. If your move is extremely short term and you don't have colored labeling materials on hand, you might consider something as simple as labeling boxes by number or letter.
Read more

History of Halloween
Straddling the line between fall and winter, plenty and paucity, life and death, Halloween is a time of celebration and superstition. It is thought to have originated with the ancient Celtic festival of Samhain, when people would light bonfires and wear costumes to ward off roaming ghosts. In the eighth century, Pope Gregory III designated November 1 as a time to honor all saints and martyrs; the holiday, All Saints' Day, incorporated some of the traditions of Samhain. The evening before was known as All Hallows' Eve and later Halloween. Over time, Halloween evolved into a secular, community-based event characterized by child-friendly activities such as trick-or-treating. In a number of countries around the world, as the days grow shorter and the nights get colder, people continue to usher in the winter season with gatherings, costumes and sweet treats. ANCIENT ORIGINS OF HALLOWEEN Halloween's origins date back to the ancient Celtic festival of Samhain (pronounced sow-in). The Celts, who lived 2,000 years ago in the area that is now Ireland, the United Kingdom and northern France, celebrated their new year on November 1. This day marked the end of summer and the harvest and the beginning of the dark, cold winter, a time of year that was often associated with human death. Celts believed that on the night before the new year, the boundary between the worlds of the living and the dead became blurred. On the night of October 31 they celebrated Samhain, when it was believed that the ghosts of the dead returned to earth. In addition to causing trouble and damaging crops, Celts thought that the presence of the otherworldly spirits made it easier for the Druids, or Celtic priests, to make predictions about the future. For a people entirely dependent on the volatile natural world, these prophecies were an important source of comfort and direction during the long, dark winter. To commemorate the event, Druids built huge sacred bonfires, where the people gathered to burn crops and animals as sacrifices to the Celtic deities. During the celebration, the Celts wore costumes, typically consisting of animal heads and skins, and attempted to tell each other's fortunes. When the celebration was over, they re-lit their hearth fires, which they had extinguished earlier that evening, from the sacred bonfire to help protect them during the coming winter. By 43 A.D., the Roman Empire had conquered the majority of Celtic territory. In the course of the four hundred years that they ruled the Celtic lands, two festivals of Roman origin were combined with the traditional Celtic celebration of Samhain. The first was Feralia, a day in late October when the Romans traditionally commemorated the passing of the dead. The second was a day to honor Pomona, the Roman goddess of fruit and trees. The symbol of Pomona is the apple and the incorporation of this celebration into Samhain probably explains the tradition of bobbing for apples that is practiced today on Halloween . On May 13, 609 A.D., Pope Boniface IV dedicated the Pantheon in Rome in honor of all Christian martyrs, and the Catholic feast of All Martyrs Day was established in the Western church. Pope Gregory III (731-741) later expanded the festival to include all saints as well as all martyrs, and moved the observance from May 13 to November 1. By the 9th century the influence of Christianity had spread into Celtic lands, where it gradually blended with and supplanted the older Celtic rites. In 1000 A.D., the church would make November 2 All Souls' Day, a day to honor the dead. It is widely believed today that the church was attempting to replace the Celtic festival of the dead with a related, but church-sanctioned holiday. All Souls Day was celebrated similarly to Samhain, with big bonfires, parades, and dressing up in costumes as saints, angels and devils. The All Saints Day celebration was also called All-hallows or All-hallowmas (from Middle English Alholowmesse meaning All Saints' Day) and the night before it, the traditional night of Samhain in the Celtic religion, began to be called All-hallows Eve and, eventually, Halloween. HALLOWEEN COMES TO AMERICA Celebration of Halloween was extremely limited in colonial New England because of the rigid Protestant belief systems there. Halloween was much more common in Maryland and the southern colonies. As the beliefs and customs of different European ethnic groups as well as the American Indians meshed, a distinctly American version of Halloween began to emerge. The first celebrations included play parties, public events held to celebrate the harvest, where neighbors would share stories of the dead, tell each other's fortunes, dance and sing. Colonial Halloween festivities also featured the telling of ghost stories and mischief-making of all kinds. By the middle of the nineteenth century, annual autumn festivities were common, but Halloween was not yet celebrated everywhere in the country. In the second half of the nineteenth century, America was flooded with new immigrants. These new immigrants, especially the millions of Irish fleeing Ireland's potato famine of 1846, helped to popularize the celebration of Halloween nationally. Taking from Irish and English traditions, Americans began to dress up in costumes and go house to house asking for food or money, a practice that eventually became today's "trick-or-treat" tradition. Young women believed that on Halloween they could divine the name or appearance of their future husband by doing tricks with yarn, apple parings or mirrors. In the late 1800s, there was a move in America to mold Halloween into a holiday more about community and neighborly get-togethers than about ghosts, pranks and witchcraft. At the turn of the century, Halloween parties for both children and adults became the most common way to celebrate the day. Parties focused on games, foods of the season and festive costumes. Parents were encouraged by newspapers and community leaders to take anything "frightening" or "grotesque" out of Halloween celebrations. Because of these efforts, Halloween lost most of its superstitious and religious overtones by the beginning of the twentieth century. By the 1920s and 1930s, Halloween had become a secular, but community-centered holiday, with parades and town-wide parties as the featured entertainment. Despite the best efforts of many schools and communities, vandalism began to plague Halloween celebrations in many communities during this time. By the 1950s, town leaders had successfully limited vandalism and Halloween had evolved into a holiday directed mainly at the young. Due to the high numbers of young children during the fifties baby boom, parties moved from town civic centers into the classroom or home, where they could be more easily accommodated. Between 1920 and 1950, the centuries-old practice of trick-or-treating was also revived. Trick-or-treating was a relatively inexpensive way for an entire community to share the Halloween celebration. In theory, families could also prevent tricks being played on them by providing the neighborhood children with small treats. A new American tradition was born, and it has continued to grow. Today, Americans spend an estimated $6 billion annually on Halloween, making it the country's second largest commercial holiday. TODAY'S HALLOWEEN TRADITIONS The American Halloween tradition of "trick-or-treating" probably dates back to the early All Souls' Day parades in England. During the festivities, poor citizens would beg for food and families would give them pastries called "soul cakes" in return for their promise to pray for the family's dead relatives. The distribution of soul cakes was encouraged by the church as a way to replace the ancient practice of leaving food and wine for roaming spirits. The practice, which was referred to as "going a-souling" was eventually taken up by children who would visit the houses in their neighborhood and be given ale, food, and money. The tradition of dressing in costume for Halloween has both European and Celtic roots. Hundreds of years ago, winter was an uncertain and frightening time. Food supplies often ran low and, for the many people afraid of the dark, the short days of winter were full of constant worry. On Halloween, when it was believed that ghosts came back to the earthly world, people thought that they would encounter ghosts if they left their homes. To avoid being recognized by these ghosts, people would wear masks when they left their homes after dark so that the ghosts would mistake them for fellow spirits. On Halloween, to keep ghosts away from their houses, people would place bowls of food outside their homes to appease the ghosts and prevent them from attempting to enter. HALLOWEEN SUPERSTITIONS Halloween has always been a holiday filled with mystery, magic and superstition. It began as a Celtic end-of-summer festival during which people felt especially close to deceased relatives and friends. For these friendly spirits, they set places at the dinner table, left treats on doorsteps and along the side of the road and lit candles to help loved ones find their way back to the spirit world. Today's Halloween ghosts are often depicted as more fearsome and malevolent, and our customs and superstitions are scarier too. We avoid crossing paths with black cats, afraid that they might bring us bad luck. This idea has its roots in the Middle Ages , when many people believed that witches avoided detection by turning themselves into cats. We try not to walk under ladders for the same reason. This superstition may have come from the ancient Egyptians, who believed that triangles were sacred; it also may have something to do with the fact that walking under a leaning ladder tends to be fairly unsafe. And around Halloween, especially, we try to avoid breaking mirrors, stepping on cracks in the road or spilling salt. But what about the Halloween traditions and beliefs that today's trick-or-treaters have forgotten all about? Many of these obsolete rituals focused on the future instead of the past and the living instead of the dead. In particular, many had to do with helping young women identify their future husbands and reassuring them that they would someday, with luck, by next Halloween, be married. In 18th-century Ireland, a matchmaking cook might bury a ring in her mashed potatoes on Halloween night, hoping to bring true love to the diner who found it. In Scotland, fortune-tellers recommended that an eligible young woman name a hazelnut for each of her suitors and then toss the nuts into the fireplace. The nut that burned to ashes rather than popping or exploding, the story went, represented the girl's future husband. (In some versions of this legend, confusingly, the opposite was true: The nut that burned away symbolized a love that would not last.) Another tale had it that if a young woman ate a sugary concoction made out of walnuts, hazelnuts and nutmeg before bed on Halloween night she would dream about her future husband. Young women tossed apple-peels over their shoulders, hoping that the peels would fall on the floor in the shape of their future husbands' initials; tried to learn about their futures by peering at egg yolks floating in a bowl of water; and stood in front of mirrors in darkened rooms, holding candles and looking over their shoulders for their husbands' faces. Other rituals were more competitive. At some Halloween parties, the first guest to find a burr on a chestnut-hunt would be the first to marry; at others, the first successful apple-bobber would be the first down the aisle. Of course, whether we're asking for romantic advice or trying to avoid seven years of bad luck, each one of these Halloween superstitions relies on the good will of the very same "spirits" whose presence the early Celts felt so keenly.
Read more

11 Laundry Mistakes
Are you using too much detergent? Overloading the washer? Overdoing the bleach? Find out the answers to these questions and more, and pick up some smart laundry tips in the bargain. Mistake 1: Rubbing Stains Furiously This can make the stain worse and possibly wear away the fabric. Instead, be gentle and methodical. Treat the stain as soon as you can; the less time that elapses, the more success you'll have. And always use a white cloth so that colors can't transfer. Dab, rather than rub, working from the outside in to keep the stain contained. Mistake 2: Using Too Much Detergent Excess suds can hold dirt pulled from clothes and get caught in areas that won't always rinse clean, like under a collar, leading to bacteria buildup. The remedy: Use only half the amount of detergent that you normally do, then gradually increase that amount if your clothes are not coming out as clean as you would like. An exception: If you have hard water, you may actually need more soap than you are using. Check the recommendation for hard water on your detergent bottle. Mistake 3: Filling the Washing Machine Incorrectly When washing in a top-loader with liquid detergent, you should first fill with water, then add soap, then add clothes, right? Well, no. This protocol from the past was meant to prevent residue on the fabric and the machine. But modern detergents are phosphate-free and not harmful to clothes the way old formulas were. As long as you're not using bleach, don't add clothing after the water (a pain, because clothes can float). Instead, use this order to distribute detergent best: clothes, then water, then soap. Mistake 4: Washing an Item That Has a "Dry-Clean" Label This isn't necessarily a blunder. Most items that say "dry-clean" can be hand washed and air-dried. This includes natural fibers, such as linen and most silks. First check for colorfastness; moisten a cotton swab with mild detergent and dab it on a hidden seam to see if any dye comes off. If not, go ahead and dunk the garment in soapy water just once or twice, then rinse and immediately roll it in a towel to extract moisture. However, you should stick with dry-cleaning for certain categories: leather, suede, silk dupioni, anything with embellishments, and structured pieces (like blazers). Mistake 5: Not Zipping Zippers All the Way to the Top Metal teeth can snag delicate and woven clothing that's being washed in the same load. Mistake 6: Overusing Bleach Think twice before you reach for the bleach: You actually don't need it to get rid of protein stains, like blood, sweat, and tears. (Okay, maybe tears are not a big laundry issue.) One natural option: Toss stained socks, tees, and undies into a big pot of water with a few lemon slices and bring to a boil for a few minutes. Mistake 7: Not Leveling Your Washing Machine IIf your washer is not level, vibrations can damage your floor and prematurely wear out key components, like the shock absorbers and the tub bearings. (Plus, there's that terrible noise.) Place a level on top of the machine and adjust the feet, which typically screw up and down, accordingly. If this doesn't help, beef up the floor with a 1/4-inch-thick piece of plywood that's a little larger than the machine's base. It will help absorb vibrations. Mistake 8: Letting the Dryer Rest Between Loads Some folks like to wait an hour after one cycle concludes before putting in a new load. But in fact, running back-to-back dryer loads is smart and efficient. It lets you take advantage of retained heat from the previous cycle, cutting down on energy usage. Mistake 9: Ignoring the Permanent Press Setting on Your Dryer This medium-heat cycle with a cool-down period at the end is a proven crease curber. More tips: Don't pack clothes in; they need to float freely or they'll wrinkle. (Note: Ditto for the washer. Stuffing it can create wrinkles and prevent your clothes from getting clean. On top of that, it can put pressure on the machine's bearings and shock absorbers, causing them to wear down prematurely.) And procrastinators, take note: It really does eliminate creases if you fold clothes when they're still hot, right out of the dryer (or, if you prefer, right out of the pile that you dumped onto your bed). Give each item a quick shake so wrinkles don't set in. If you don't have time to fold a load immediately, shake out the pieces and lay them flat in the laundry basket, one on top of another, while they await further attention. Mistake 10: Tossing Socks in Willy-Nilly Here's a sock-saving tip: Place socks in the washer tub first, so they're less likely to attach themselves to other garments and then go missing. Mistake 11: Not Cleaning Your Dryer Even though you empty the lint filter after each use (right?), lint buildup can clog the duct over time and become a fire hazard. A sure sign that your dryer is clogged? It takes more than an hour to dry a load. Once a year, detach the hose from the back of the dryer and snake a long brush through to push out lint (20-foot dryer vent brush, $35, gbindustrialdirect.com ). Also scrub the lint filter once a year with a small toothbrush and a bit of detergent. Rinse, then air-dry completely. 520 Park Avenue
Read more
Pumpkin Recipes
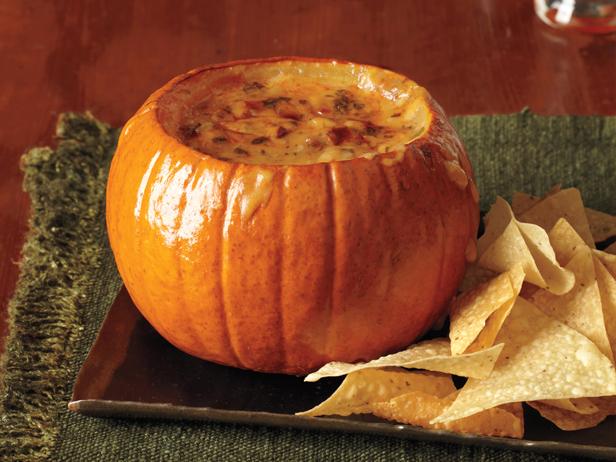
Tis the season - pumpkin season that is. Thank you, Starbucks, for starting the infamous trend that has become more of a phenomenon among the autumn-obsessed food lovers since 2004: pumpkin spice EVERYTHING. For those of you keen on gourd-inspired recipes, you'll be happy to find 3 different ways below how you can spruce up your meal with pumpkin: Pumpkin and Pork Cheesy Stuffed Shells Recipe serves 4 prep time: 40 minutes, including pumpkin roasting active time: 1 hour total time: 1 hour 40 minutes 1/2 small pumpkin, about 1 1/2 cups small dice 5-6 fresh sage leaves grapeseed, or other neutral oil, as needed salt and freshly ground pepper 1 small onion, diced 1/2 lb ground pork 1 tablespoon fresh sage, chopped 1/2 teaspoon crushed red pepper flakes salt and freshly ground pepper 16 large pasta shells 1 cup shredded mozzarella, divided 2 cups marinara sauce Preheat the oven to 400ºF. Peel and cube the pumpkin (In the photos, I sliced, but cubing will cook faster and eliminate the need for you to cube later). Place on a baking sheet (I lined my baking sheet for easy clean up) and toss with 1 tablespoon of oil. Season generously with salt and pepper. Nestle 5-6 fresh sage leaves into the pumpkin. Bake for 20-25 minutes until slightly golden and very tender. In a frying pan, heat up a touch of oil over medium high heat. Add the onion and cook, until slightly soft. Add the pork, and cook, breaking up, until golden brown and cooked through. Stir in the sage and red pepper flakes. Taste and season with salt and pepper. Remove from the heat and place in a bowl. By now your pumpkin should be nice and tender. Remove from the oven and stir into the pork mixture. Let everything cool slightly so that you can touch it comfortably. Be sure to leave the oven on as you're going to bake the casserole. While the pork-pumpkin mix is cooling, cook the shells according to the package and drain. Typically I never rinse pasta, but in this case, we want to be able to touch the shells, so rinse off in cool pasta. Mix 1/2 cup shredded mozzarella into the pumpkin mix and give it another taste and adjust seasoning accordingly, if needed. Spread out 1 cup of marinara sauce in a square (8 or 9 inch) oven-proof casserole dish and set aside. Stuff each shell with a generous amount of filling, placing the stuffed shells in the sauced dish. Stuff all the shells - you may have leftover filling, which tastes great on it's own, or you can lay it on top of the shells. Top the shells with the remaining 1 cup of sauce and remaining 1/2 cup shredded mozzarella. Bake the dish for 30 minutes or until sauce is bubbly and cheese is golden. Remove and let cool slight before enjoying! Pumpkin Queso Fundido Total Time: 2 hr 20 min Prep: 20 min Cook: 2 hr Yield:6 to 8 servings Level:Easy 1 2 -to-3-pound sugar pumpkin 8 ounces dried chorizo, diced 1 jalapeno pepper (remove seeds for less heat), chopped 1 4 -ounce can chopped green chiles 1/2 teaspoon ground cumin 1/4 teaspoon cayenne pepper 3 tablespoons all-purpose flour 1 1/2 cups low-sodium chicken broth 2 cups shredded mozzarella or Oaxaca cheese 1 cup shredded monterey jack cheese Chopped fresh cilantro, for topping Tortilla chips, for serving ADD CHECKED ITEMS TO GROCERY LIST From our sponsor Try it. Don't like it? Money Back Guarantee. We stand behind the quality of our meat and produce. Freshness Guarantee *If you don't love our produce, bring your receipt back for a full refund. Directions 1. Preheat the oven to 375 degrees F. Slice off the top 1 1/2 inches of the pumpkin and discard. Scoop out the seeds and stringy pulp. 2. Heat the chorizo in a medium pot over medium-high heat until the fat begins to render, about 5 minutes. Add the jalapeno, green chiles, cumin and cayenne and cook, stirring, until the jalapeno softens, about 2 minutes. Stir in the flour and cook, stirring, until the flour is slightly toasted, about 2 minutes. Add the chicken broth and bring to a boil. Reduce the heat to medium and stir in the cheeses. Cook, stirring occasionally, until the cheese melts and the mixture is creamy, about 3 more minutes. Place the pumpkin in a small baking dish and fill the pumpkin with the cheese mixture. Add 1 inch of boiling water to the baking dish. Cover loosely with foil and bake until the pumpkin is tender, about 1 hour, 20 minutes. Remove the foil and continue baking until the cheese is golden and bubbly, 20 to 25 more minutes. Let cool 5 to 10 minutes. Sprinkle with cilantro and serve with tortilla chips. Pumpkin spice pancakes ** makes 8 pancakes 1/2 C all-purpose flour 1/4 C whole wheat flour 1/4 tsp baking powder 1/4 tsp cinnamon 1/8 tsp each nutmeg, all-spice & ginger pinch of sea salt 1/4 C pure pumpkin puree 1 tbsp maple syrup 1 C almond milk 1-3 tbsp vegan butter for cooking Heat a non-stick pan to medium / medium-low and pre-heat oven to 200 F. You'll place the pancakes on a baking sheet or plate in the oven to keep them warm while you cook. In a mixing bowl combine the flours, spices, baking powder, and sea salt together with a fork. Add pumpkin puree, maple syrup, and almond milk and whisk together until well combined. Use a 1/4 cup for each pancake. Lightly butter the pan with some vegan butter. I like using a paper towel to spread it evenly around the pan. Scoop batter into the center of the pan. Once it starts to bubble all around and the edges of the pancake are slightly cooked through, that's when you flip it. It's approx. 2 minutes each side. Be sure to adjust your burner temperature as you go as the pan will get really hot half way through. Serve with more vegan butter and real maple syrup! 520 Park Avenue
Read more
Activities For The Park
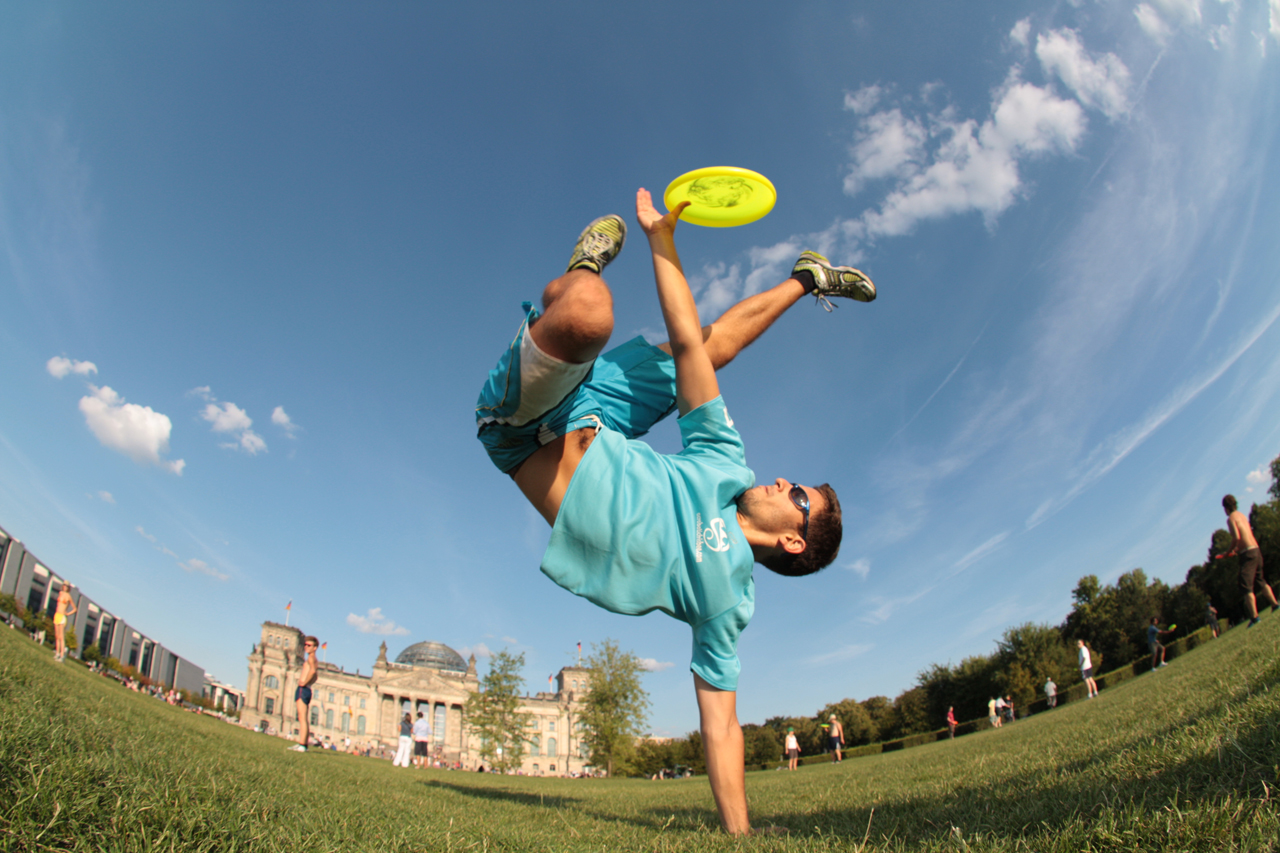
Even if your budget's tight, you can find ample adventures at a park. Whether your local park is a small neighborhood green space or an expansive national park, take advantage of your nearest recreational area and plan an outing for the whole family, no matter how young or old. If you don't have kids, these activities are still fun if you're a kid at heart! Use these suggestions to get your crew off the couch and out into the sun for some healthy, free (or cheap) warm weather fun. Classic Playground Activities If you're packing little ones, hit your neighborhood or community parks for fun and exercise that goes beyond the swing-set. Your kids will have a blast scrambling up rope nets and navigating obstacles in fortresslike play ports. See-saws, giant slides, monkey bars, pint-sized zip-lines and mini rock-climbing walls are just some of the wonders you'll find at park playgrounds. And, of course, there will be swings! So pack some sunscreen, snacks and juice boxes and head to the park for some full-body fun. Your kids will be building strength, agility and confidence, and laughing all the way. Have a Picnic Can you ever be too young or too old for a picnic? Grab a basket and blanket for a lazy, languid feast on a grassy park lawn. Or load some hearty fare into a backpack and hike to the perfect spot near a waterfall or to a peak with an endless view. If you're heading to a park with a lake or pond, take along some extra bread to feed the ducks Play Ball Many community parks have tennis courts and fields for soccer and baseball. They offer leagues for organized sports, but you don't have to be on a team to enjoy playing around with a ball. An open field is a great place to practice kicking around the soccer ball or have a game of catch. Show up with a ball and you just might find enough willing players for a pick-up game. Learn About Nature Are you interested in some close encounters of the natural kind? State and national parks teem with wildlife, both the stationary and the ambulatory kinds. You can expose your children to the wonder of nature and learn about native plant and animal species that inhabit various environments. Take along your camera to capture the weird and wonderful things you find. Later, you can make a scrapbook detailing your discoveries. Take A Hike Local, state and national parks offer many different opportunities for hiking. Some are short, easy treks to breathtaking scenery; others are major climbs that test your endurance. Preparing for a big hike can be a fun and healthy family activity, too. Some parks even have trails for those with physical limitations or special needs. Check the Web site of the park you have in mind to learn about don't-miss scenery, special features, the length and challenge rating of trails, and whether or not pets are welcome. Special Events Parks cater to families and often host fairs, carnivals and special events to get your attention. The activities depend a lot on the type of park. Look for carnivals with games, races and inflatable play objects at community parks. Turn to state and national parks for events that introduce you and your kids to outdoor and high-adventure sports like orienteering, archery, fishing and canoeing. Holidays are big events for parks, too. They offer activities like Easter egg hunts, winter wonderlands, parades and firework displays. Set up a Challaenge Parks offer big, wide-open spaces perfect for staging a race, obstacle course or other family challenge. Break up into teams for a relay race. Designate age groups for foot or bicycle races. Bring a few simple props and set up your own family field day. Here are some examples: Hula-hoops or jump ropes for an endurance challenge Eggs and spoons for a balance-testing relay challenge Soccer ball for a dribbling challenge Plastic cups and water for a balancing-on-the-head race challenge Rope for tug-of-war and three-legged race For high-adventure challenges, look for parks that offer canopy tours, rock climbing or zip-lines Scavenger Hunt A scavenger hunt is a great way to explore numerous areas of a park in a relatively short time. Make a list of things you would find at your particular park, and divide your group into teams. Give each team a list and a bag to collect items. Include supplies like a camera if challengers need to prove they climbed to the top if a hill, or paper and a pencil to take a rubbing if they have to find a particular statue. Finally, determine a place to meet after gathering all the items on the list. The first team back with everything on the list wins. Prizes can be a free pass on cleaning rooms or the winner's pick for dessert. Conversely, the losing team might have to do something for the winners, like cook dinner. Frisbee or Frisbee Golf Need we state the obvious awesomeness here?
Read more
Why You Should Own a Daybed
The daybed. It's that piece of furniture that graced your childhood room (or was that just me?) that you resented because it didn't look like a "real" bed, but now, as an adult, you realize is far more chic and useful and full of potential than you ever gave it credit for. The daybed is a really smart solution to tiny space living. It's a sofa and a bed, all in one, and can be styled with pretty pillows and throws while you're not sleeping on it so your space comes off more like a living room than a bedroom. They are as deep as a twin bed, so when being used as a sofa, they are extra deep and down right delicious to cuddle up on. Now, the daybed comes in many varieties. Some take the form of an extra deep bench, which lends a very European sense to your home. Others, and my personal favorite, are more traditional with a back and arms, and can be used everywhere from the bedroom, to the living room, to the porch/balcony/patio to dens and offices. Heck, it's even worth trying on in the dining room! Check out these 15 gorgeous rooms where the daybed is the star. (Image credit: Domino ) Designer and blogger Lauren McGrath (who works with her mother Suzanne for their firm McGrath II ) employed a faux-bamboo daybed in her 250-square-foot New York studio apartment, featured in Domino . (Image credit: KK Living ) Corners in rooms can be tricky, especially for furniture. A bench-style daybed is the perfect solution, like the one above from KK Living . (Image credit: Elle Decor ) Sometimes while you work really, really hard, a power nap is in order, right? Having a daybed in your home office (like this one from Elle Decor ) is just as convenient as it is lovely. (Image credit: Vogue ) Of course heralded shoe designer Bruno Frisoni of Roger Vivier would have a home in Tangier as fabulous as the one featured in Vogue , complete with facing daybeds, the perfect set up for afternoon tea and lengthy conversations (or catnaps). (Image credit: House Beautiful ) Featured in House Beautiful , designer Stephen Shubel smartly created a dual-purpose furnishing for the above project, where cubbies come together as the base for a daybed. This would be a great space-saving solution for a small living room: bookcase and sofa in one! (Image credit: Coastal Living ) Daybeds should have a much greater fate than just living indoors all the time. This lovely porch from Coastal Living shows one hanging from rope for the ultimate porch swing. (Image credit: Free People ) This plant-happy corner, spotted on retailer Free People's website (though the product is no longer available), channels our inner Justina Blakeney jungalow. (Image credit: Urban Outfitters ) Here's inspiration from another retailer, this time, it's Urban Outfitters . We think a daybed like this one would work really well to separate spaces in an open (or small) floor plan. (Image credit: Hickman Interiors ) Chicago-based designer Tracy Hickman created a cozy and inviting porch setup with an ultra-deep daybed. We can see ourselves lounging around all summer and fall on this baby. If you want to try the look, remember to pick a material for the frame that will wear well outdoors (the one above is teak), and that the cushions are made of outdoor fabric, which will resist fading and mold/mildew. (Image credit: Madog Bolig ) It's hard not to have a room crush on this Copenhagen space, seen on Mad & Bolig . The pop of cerulean blue from the daybed energizes the neutral finishes. (Image credit: Homedit via Mi Casa ) A daybed is the perfect solution for a spare bedroom, where you want to create space for overnight guests, but also leave room for a desk. Opting for a daybed rather than a bed saves space since you can push it up against the wall length-wise, leaving more walking room. (via Homedit ) (Image credit: Citizen Atelier ) Talk about swoon-worthy! Just imagine leaning back, reading a book, maybe dosing off for a few minutes, and then digging your toes into a shaggy, puffy rug. This room (featured in an inspiration gallery on Citizen Atelier ), is a (literal) dream. (Image credit: Land of Nod ) A deep daybed in a common room is a great spot to curl up and kick back with your little ones (or anyone, really). (via Land of Nod ) (Image credit: Emily Henderson ) Emily Henderson absolutely falls into the "I have a design crush on her" category. Her daughter's nursery features a vintage daybed so she can get in plenty of baby snuggles. 520 Park Avenue http://www.apartmenttherapy.com/the-daybed-is-the-glorious-piece-of-furniture-youre-probably-not-using-but-should-be-234052
Read more